What is the use of Connections in Zoho People?
Introduction
Connections in Zoho People allow you to securely link Zoho People with Zoho services or third-party applications. Think of a connection as a secure login that gives your application access to required data without repeated authentication. Once established, a connection lets you use REST APIs in custom functions and Deluge scripts to interact with external services efficiently.
Connections are available in all Zoho People paid plans and support three types of authentication: Basic, OAuth 1.0, and OAuth 2.0.
Step-by-Step Instructions:
1. Default Services: Quick Setup for Common Integrations
To create a connection using the default services in Zoho People:
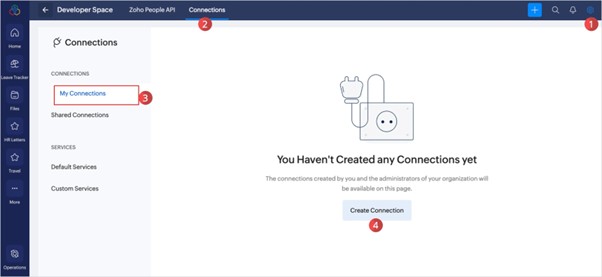
- Go to Settings > Developer Space > Connections > My Connections.
- Click Create Connection.
- Under the Default Services tab, choose the service you want to integrate (for example, Slack).
- Enter the Connection Name and Link Name.
- Choose the required Scopes.
- Click Create and Connect, then Connect again.
- Sign in to the third-party application and authorize the connection.
- Once connected, Zoho People displays the connection status, name, and code snippet for use in Deluge scripts.
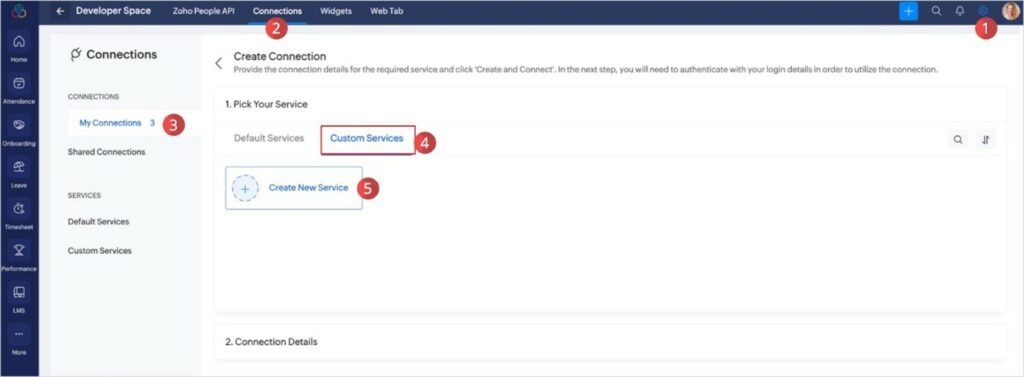
2. Custom Services: Build Your Own Integration
If the service is not listed under Default Services, you can configure it as a Custom Service.
To register your client app with Zoho (required for OAuth2-based apps):
- Go to Zoho Developer Console.
- Click Add Client ID.
- Enter the Client Name, Client Domain, and set the Redirect URI as:
https://deluge.zoho.com/delugeauth/callback - Select Web Based as Client Type and click Create.
- The Client ID and Client Secret will be available in the newly created app.
To create a custom service and connect it:
- Go to Settings > Developer Space > Connections > My Connections.
- Click Create Connection.
- Switch to the Custom Service tab.
- Enter the Service Name and Link Name.
- Choose the Authentication Type (OAuth 2.0, for example).
- Provide the required URLs:
- Request Token URL
- Access Token URL
- Refresh Token URL (if applicable)
- Enter the Client ID and Client Secret from the developer console.
- Define:
- Scope Name
- Scope Display Name
- Scopes (from the third-party provider)
- Scope Delimiter (usually a comma)
- Click Create Service.
- From the Service Summary, click Create Connection, then Create and Connect.
3. Sample Integration: Zoom
Example to integrate Zoom with Zoho People:
- Go to My Connections > Create Connection.
- Select the Custom Service tab.
- Enter:
- Service Name: Zoom Meeting
- Link Name: your_link_name
- Authentication Type: OAuth 2.0
- Parameter Type: Header
- Grant Type: Client Credentials
- Add:
- Authorize URL: https://zoom.us/oauth/authorize
- Access Token URL: https://zoom.us/oauth/token
- Refresh Token URL: https://zoom.us/oauth/token
- Client ID and Secret from your Zoom App
- Scopes as provided by Zoom
- Click Create Service.
- Then click Create Connection followed by Create and Connect.
- Once connected, use the code provided in custom Deluge functions to make API calls.
Tips
- Use GET, POST, PUT, and DELETE to perform different operations through your connection.
- Use Parameters in functions to dynamically replace values like name, email, and ID in API calls.
- The Link Name is referenced in your custom functions as the connection identifier.
- You must have administrator privileges to create or manage connections.
- Test the connection using Deluge custom functions to verify data retrieval or actions.
