Blueprint Overview
Every business has a unique business process followed across different departments/functions. A business process is a collection of structured, related activities and a set of tasks performed by people to deliver a service or products. The business which has well defined business processes achieves an improved bottom line, improved customer satisfaction and improved agility for reacting to rapid market change.
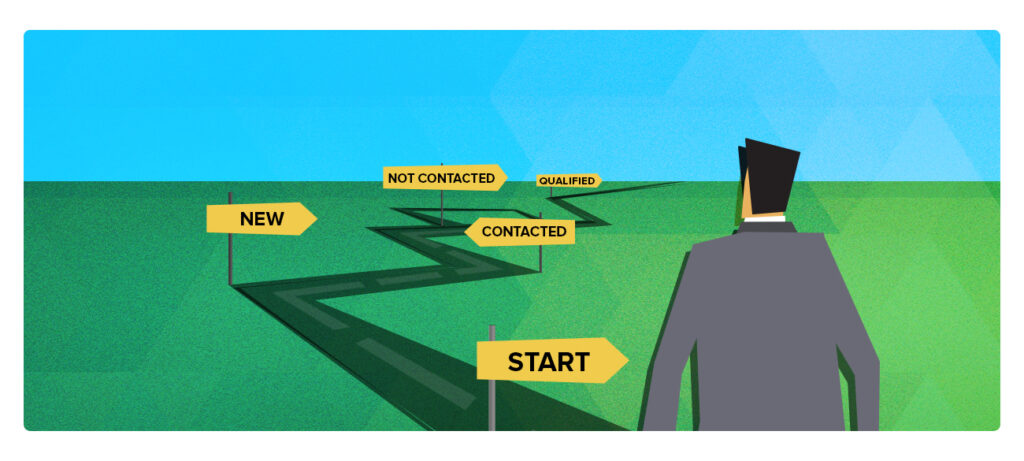
Blueprint in Zoho CRM helps you/your team to execute the business process in a systematic and well-defined manner. With Blueprint you can achieve process automation by automating most of the repetitive tasks. The Zoho CRM Blueprint is simply an online replica of your unique business process with mandates & validations at every stage, automations. It is a sequence of state and transitions, you can think of state as a step in your business process and transition as an action(s) performed at each stage in order to move to the next stage.
Sample Blueprint
The following diagram shows a sample flow of a software services organisation’s well defined Lead nurturing process. This organisation aggregates leads via various channels into the Zoho CRM, the lead will be in status none when created, once the lead is received they send a welcome email immediately and carry out prospect research to gather the background of the lead, their decision makers, requirements, competitors.,etc in order to make a tailored sales pitch. After complete prospect research their sales team arranges a prospecting/discovery call to gather requirements and pitch services, they have a well defined follow-up process before The following diagram shows a sample flow of a software services organisation’s well defined Lead nurturing process. This organisation aggregates leads via various channels into the Zoho CRM, the lead will be in status none when created, once the lead is received they send a welcome email immediately and carry out prospect research to gather the background of the lead, their decision makers, requirements, competitors.,etc in order to make a tailored sales pitch. After complete prospect research their sales team arranges a prospecting/discovery call to gather requirements and pitch services, they have a well defined follow-up process before they qualify the lead. During the process they will clean-up the unauthentic/ junk leads.
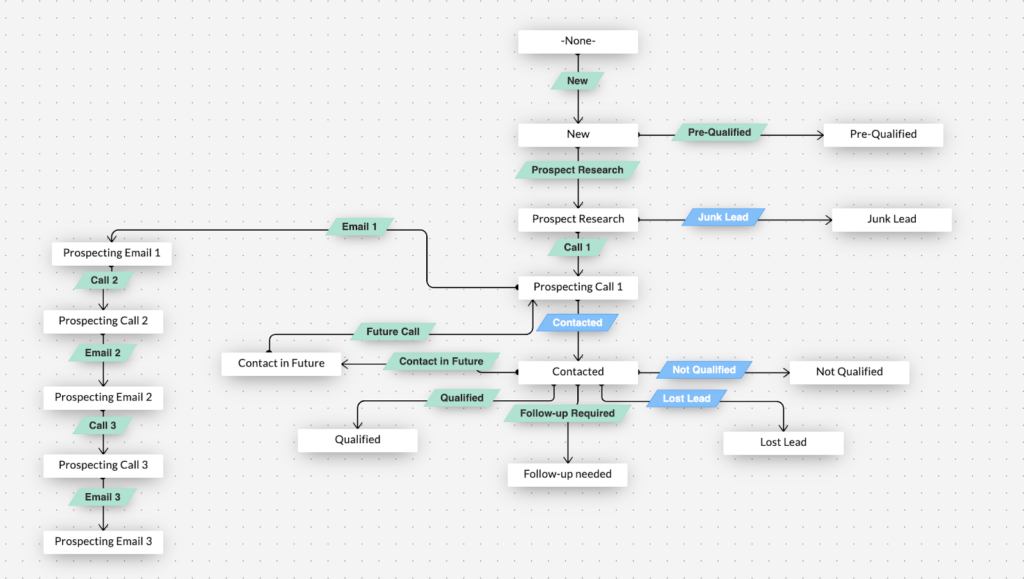
This blueprint is created for the ‘Leads’ module and the states are based on the Lead Status. In the blueprint white rectangular boxes are Lead status (states), greens are transitions and blues are common transitions (associated with more than one state).
Points to note,
- Blueprints are module based
- Different blueprint can be created for different layouts of the same module
- Multiple blueprints can be created for a module based on the different fields. The execution order will be based on the order of the blueprint.
Automations with Blueprint
Assignment
Assignment rule is designed to automate the lead assignment, based on the Lead Status we can assign leads to each representative. By using this assignment process we can save a lot of time, effort and manual errors. Zoho CRM has advanced workflows and a scripting engine that uses Deluge.
Notifications(Email, SMS, Whatsapp)
With the help of alerts, get instant alert notifications about the changes through Email,SMS,Whatsapp.
Email Open rates at about 20%, SMS open rates are at about 30%, while WhatsApp has an open rate of around 95%
Tasks
Blueprint lets you automate the tasks by setting up the workflow. We can design the workflow for your task. We can also execute the tasks based on a blueprint.
Field Update helps the users automatically update certain field values in the records, when the associated workflow rule is triggered.
Webhooks facilitate communication with third-party applications by sending instant web notifications every time an event occurs in your Zoho CRM With Webhooks, you can configure HTTP URLs and associate them in workflow rules to automate the entire notification process.
Custom actions let you add workflow actions to your application in addition to those available by default (alerts, tasks, field updates, webhooks, and custom functions).
You're In Expert Hands – Let's Talk!
Discover how we can transform your business with Zoho or Odoo. Book your free consultation today and take the first step toward implementing a scalable, efficient system for your success.
CONTACT US
